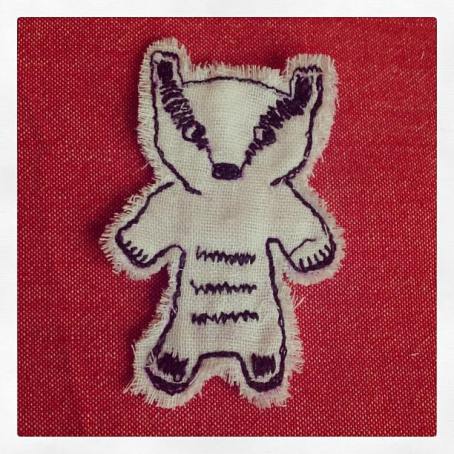
Free machine embroidery and badgers
I’ve been hankering after giving the old free machine embroidery a go for some time and then in my day job, I was asked to design a new website for Little Crab Designs – I’ve since finished her redesign and the new site is now live but you can see she and her business partner do a bit of the old free machine embroidery which inspired me to finally give it a whirl and am getting a bit addicted. Most of the projects I’ve done I haven’t taken photos of. A number of book covers have been whipped up for friend’s birthday presents and finished late at night when the photos all come out too dark.
One method I’ve stumbled on by chance which I quite like is to use several layers of lightweight muslin. This came about really because I bought the muslin to make dress muslins out of – you know the test runs you make of a new dressmaking pattern to test the fit and how it works. Well this is all new to me and I’ll get onto that in future posts but it basically resulted me in buying this lightweight muslin not realising it would be a nightmare to work with to cut accurately or to do accurate seam allowances with. I tried a Collette Ginger skirt with it and it worked to see how the process of the pattern went together but as far as fit was concerned? Total disaster. So I have a few metres of this stuff sitting around and it seemed a good rough fabric to experiment with machine embroidery.
If you fancy having a go, you simply get about three layers of lightweight muslin and use an embroidery hoop to stretch it making sure you stretch it opposite to how you do for normal embroidery – instead of the right side of the fabric being on the top of the hoop, the bit you’re going to embroider on, is what would normally be your wrong side. It’s so that the fabric sits flat against the foot plate of the machine as you work.
Then just draw your image with an air erasable or water erasable fabric marker pen and stitch away. Then when you’ve finished, you cut out your embroidered shape/picture and if you want, you can fluff up the edges a bit more by cutting into them.
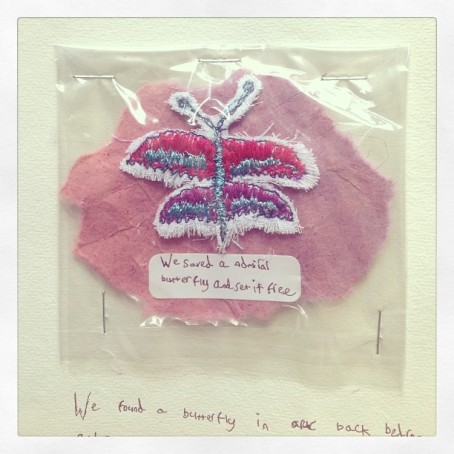
I got my youngest to draw a butterfly and we then made this for her summer holiday book using the same method about where we saved a butterfly we found in our back bedroom.
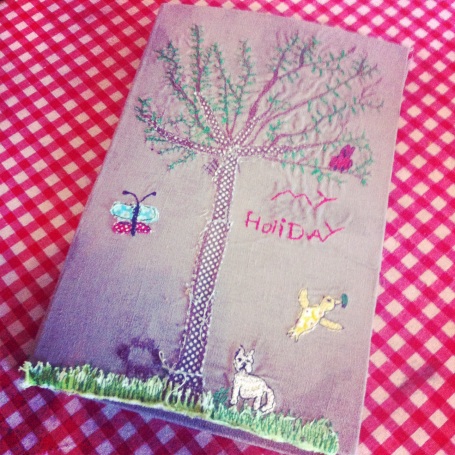
We ended up embroidering the front cover of her book too. She drew it and then I helped her embroider it. We then glued the fabric to card and used it to cover her book.
Catching Up Part 4. AKA Attempting some patchwork curtains
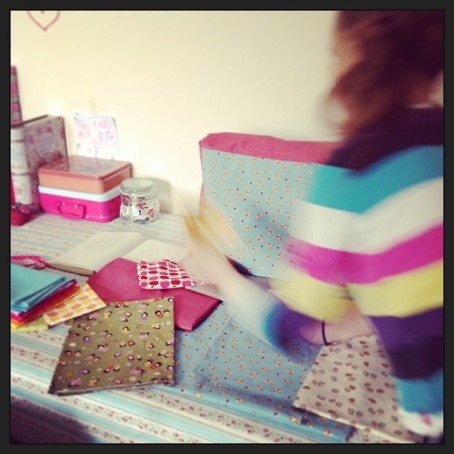
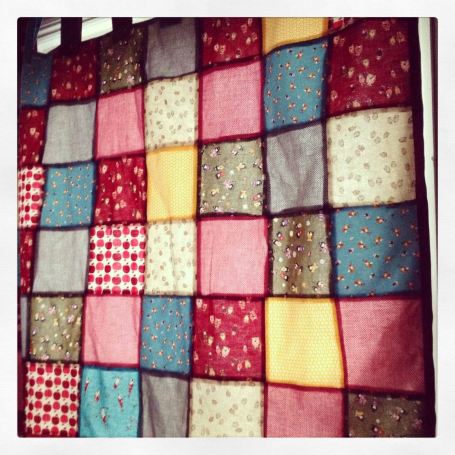
I know from reading other crafty people’s blogs that we do have a tendency to hoard save things which may come in useful in the future and my fabric stash is starting to overspill out of the cupboard. I bought some new curtains in the sale for my daughters’ bedroom but as we live in a Victorian house, they were just not long enough. I rummaged through my stash but had no fabric nearly large enough to make curtains. It seemed an obvious and simple solution to go the patchwork route. Please note the ‘seemed simple’ thought was prior to any experience of a larger patchwork project. The most I’d rustled up was a small pencil case and a small baby blanket for a friend but how hard could it be?
I measured the window, scribbled down the measurements, drew out a rectangle and worked out how many squares and at what size they’d need to be. I worked out about 96 squares and remembered to include the seam allowance in my calculations. Then we got busy choosing and starting to cut out the squares.
I think at this stage, I should fess up that this cutting out stage actually took me weeks to do. I know all you who have any experience at all of patchwork would have been laughing at my naivety the second I mentioned the words ‘simple’ and ‘patchwork solution’ in the same sentence… Well I learnt the hard way and I’m sure some googling would have probably turned up a faster method of cutting out the squares. I did get a rotary cutter which was a revelation to me. I felt like I suddenly got a super power of super accurate slicing ability.
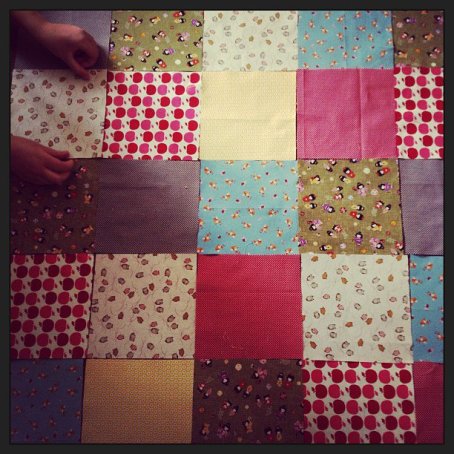
Finally about a month later, all the squares were cut out and it was time for the fun bit of planning the layout.
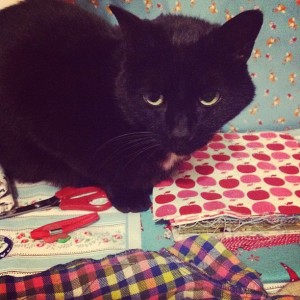
Also it seems that Dylan, the cat doesn’t seem to have lost his super power ability of being able to lie in the most inconvenient spot at any given moment.
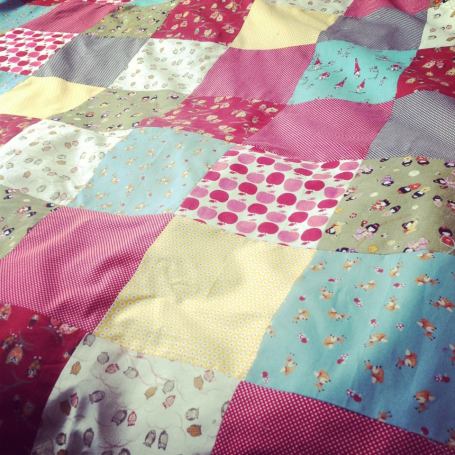
Then it was just a case of sewing each line into strips and then sewing the strips together. I actually managed to complete this step in just one evening and was v grateful again to the rotary cutter as with the nice even edges, it made it much easier to sew nice straight even seams. Eldest daughter was most helpful too and happily pressed each of the seams open for me. She was desperate to get them finished and is still at the age where ironing seems a lot of fun.
Amazingly the 96 squares are finally all together and mostly all lining up despite my admittedly starting to rush a bit. I do like how it’s been possible to use a number of favourite fabrics in these and both girls were able to choose some of their favourites. Owls and deer seem to be featuring heavily in all their favourite fabrics right now.
Then I made tabs for the top, cut out some lining fabric, sandwiched the tabs between the lining and the patchwork curtains and sewed the top of the curtains. It was at this stage where I decided to bind the edges in silky ribbon for the contrast of texture and also because I realised I hadn’t allowed for a wider seam allowance at the edges and didn’t want the outside squares to look a bit squashed and out of balance with the others. I like how sometimes mistakes can end up with something even better than would have ever happened if it had all gone to plan.
Finally it was time to hang them up and when the sun shines through, even with the fairly thick lining, you get a patchwork stained glass type effect. If they start to fade, I may put some blackout fabric behind them but the girls like how they look right now and I’m happy they’re happy and it may be some time before I tackle a larger patchwork project again. Although now a few months on, I’m already thinking how nice a patchwork throw would look on the bed…
Catching Up Part 3. AKA I love Charity Shops
It feels like another life now when I was working in the media in London. I spent years working in Soho with daily easy access to some of arguably the best retail outlets the world can offer. Now the only local shops in the village I work in seem to be the Post Office (always handy), a cake shop, a chemist, a newsagent and about five charity shops.
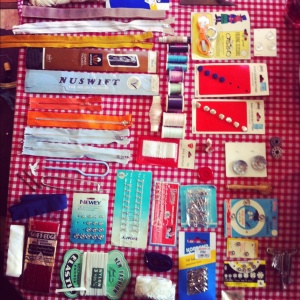
The charity shops are amazing. The other week I found a huge collection of sewing notions including lots of zips, brand new thread and some things dating back to the 50’s, 60’s and 70’s when things were pre decimalisation and post decimalisation but when the half p still existed. I bought the lot for about £2. I do wonder about who it all belonged to. What she bought the various bits for. What she made. What the shops were like where she bought the things. I’m sure though ultimately anyone owning sewing things doesn’t generally like to see things wasted so would prefer her old notions get used in some project of mine rather than going in to landfill
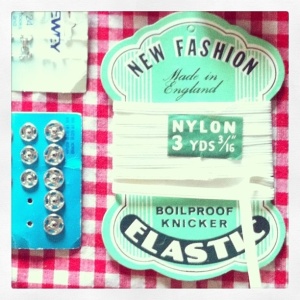 V pleased to find boilproof knicker elastic in my charity shop notions haul. I almost never want to use it as the packaging is so lovely
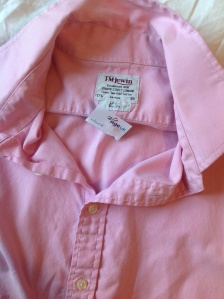
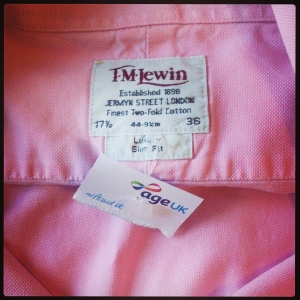
The Jermyn Street cotton shirt I debated over getting for a few days. It was so beautifully tailored and, given I was planning on cutting it up plus my dressmaking skills are very much at a beginner level, it seemed wrong to buy it if someone else may wear it as it was but it seems it was destined for my dressmaking shears. It was sewn with French seams throughout and the cotton is so soft and drapes so beautifully, it’s a total bargain at a couple of pounds for a metre plus of fabric. And in order to make something worthy of the fabric and original tailoring, I guess it’s time I tackled a French seam. I did say I’d get onto talking about them eventually although next up is to share my attempts at patchwork curtains…
Catching Up Part 2.
Now this is the part where I just upload whatever photos I have of some past makes to vaguely catch up to the present where I start to get all excited about French seams. I know… I can barely wait for that bit myself but first the photos…
There was some sewing too of various items including cushions, appliquéing owls onto towels (as you do), more drawstring bags and I thought I’d brave an attempt at some patchwork to try to bust my fabric stash.
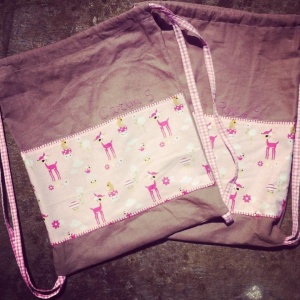
Swimming bags for the girls for school. I got a bit carried away and made matching smaller bags for their goggles/swim hats.
Catching Up Part 1
Aaaaagh! I have massively neglected my poor old blog. There I was starting with all good intentions and then life ran away with me. I won’t be boring with too many details but in short there was a year with a minimum of 25 hours a week commuting and a slight change of career from print design to digital design which involved a pretty steep learning curve plus the usual hectic mum stuff.
I’ve now settled into my new job which is local (no more heinous commute) with a great team and have been devouring sewing blogs sort of like man vs food but more woman vs sewing blogs and it’s made me miss my blog. Also I really don’t want to annoy my non crafty friends on Facebook by bombarding their news feeds with my sewing shenanigans.
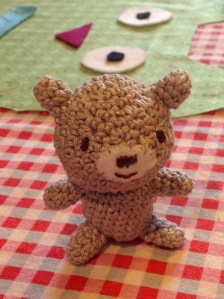
So to catch up… I’ve sewed a bit, taught myself to crochet and am starting to learn how to sew clothes. The crochet learning came from getting a free gift on Mollie Makes Magazine. Can I just pause there a minute to say… OMG – can you believe how many cool crafty mags have launched in the last couple of years??? Mollie Makes was one of the first but has blown open a whole new market for modern craft magazines. I still get excited when each new issue plops through my letterbox.
Thankyou YouTube for being there for the crochet learning. Also the book “Stitch ‘n Bitch Crochet. The Happy Hooker” by Debbie Stoller was amazing and full of clear diagrams and all the instructions I could ever need plus more on top in extra helpings.
Lovely linen part 2
You may have noticed that I’ve been rather quiet as of late. It’s that time of year when I design the fifty odd page brochure for my daughter’s school’s Summer Fayre. Plus I’ve been taking on other design work on top so have been surviving on four hours sleep on too many nights. One thing I promised myself though when it was all done was that I’d make myself this bag that I’ve been itching to do for a while now…
After my falling back in love with linen doing my book cover, I thought I’d use it on a bag and thought that this bird fabric I found on e-bay would look rather gorgeous with the linen. I so wished I had a nice bright orange bit of cotton or embroidery thread to add some accents elsewhere on the bag but settled with green as that is what I had in my threads and I used a green print for the lining.
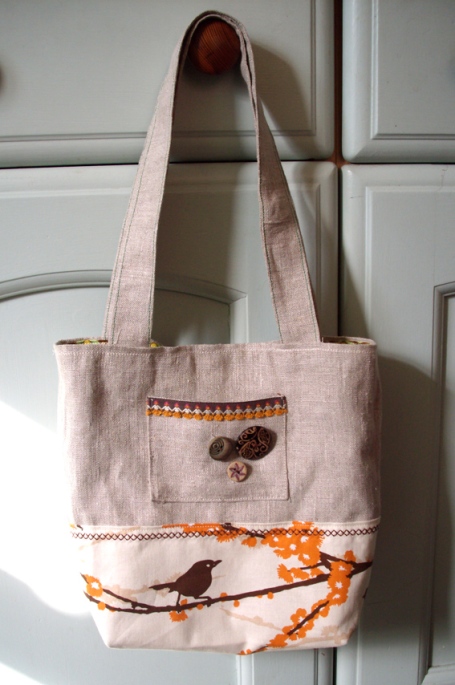
I saw a basic pattern in Sew Hip Magazine which I adapted to suit me. I used a sheet of A3 paper as a start and measured out a square using the short edge as one side so 297mm x 297mm and cut out two pieces of linen and two pieces of lining at this size.
Then I cut out two half panels of the bird fabric – I just did this by eye and what suited the fabric. These were then sewn onto the two linen panels. I did a row of cross stitch on one side and then ran out of brown thread. Why is it that when looking at reels of thread, it looks like there is like maasses of thread still on it and then before you know it nasty beige plastic is showing through? Would have dearly liked some orange for this too. But it was Sunday and I wanted my bag now and didn’t want to wait till I could get some more thread.
I thought I’d put a nice little pocket on the inside of the bag for my phone and keys so sewed on onto one of the lining panels. Here’s a piccie of it inside the finished bag. I sewed a bit of ribbon along the top of the pocket for prettyness and also to make it a bit stronger to withstand my keys bashing against it.
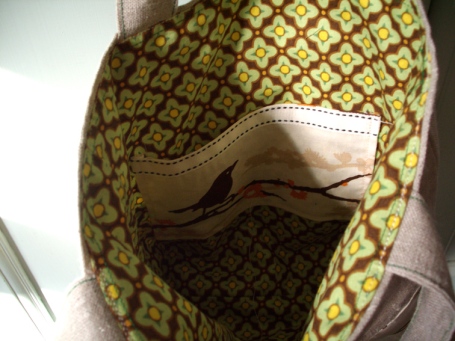
Then it was a case of sewing both linen panels around three sides and the two lining panels around the three sides. Did a quick bit of gusset sewing into the bottom of both and sewed the two gussets together and at this stage decided a pocket might look a bit lovely on the outside. I sewed another bit of ribbon along the top of it and a few buttons on – was fancying using some of my self covered ones but the colours were all wrong and I liked these and the wooden/shiny contrasts against the linen and cotton. Then I had the job of sewing the pocket on having already sewn up half the bag. Lol. Should really decide these things earlier on in the design process.
Then it was the joy of the handle sewing and turning inside out and sewing again. Again I would have loved a bit of orange on these handles but green is lovely too. Then I turned a hem down on the linen and a hem down on the lining and sewed both – then slotted in the handles and sewed it altogether.
Ta Da! Another lovely linen item.
Lovely linen part 1
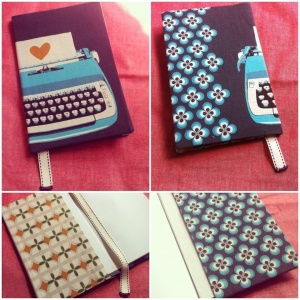
Before going to meet Dorling Kindersly book people, I noticed that the spine of my portfolio/book had a small tear in it. I didn’t have time to go get a new portfolio and thought it could be rather tasty to make my own cover. My only worry was that it would need to be beautifully finished, tasteful, simple and look professional or I’d be better off with my torn spine.
I decided on linen as being simple, beautiful and utilitarian and the method I decided to use would work on any size of book. I often cover books with fabric or paper for friends and decorate the covers for each individual suited to their personal taste.
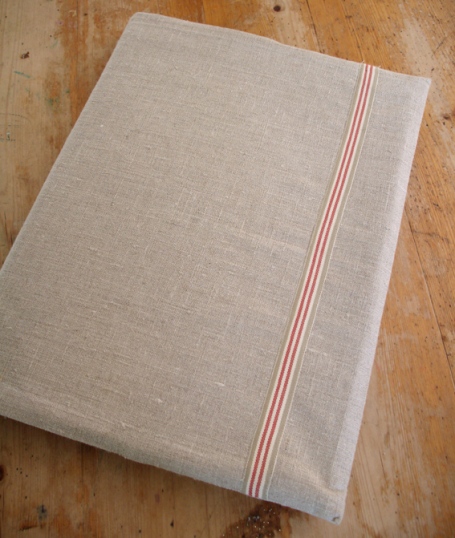
1. I first opened out my portfolio and measured roughly around it and cut out a big chunk of linen making sure to leave a large margin all around the edge with extra long bits on the left and right – a bit like covering text books at school.
2. Then I ironed on some iron-on interfacing which you can get from any haberdashery department. You don’t have to do this stage but it stabilizes the linen and makes it much easier to work with to get a neat finished look and makes it a bit more robust as a cover.
3. Next I got a ruler and drew nice straight lines and made sure I had nice right angles using my book still laid out on top (I could have measured my book and added on equal amounts to top and bottom and equal bigger amounts to left and right but where would the fun be in that? I just did it by eye with the book on top but I did make sure the front and back flap would be the same size.
4. I did a zig zag stitch all around the edge even though the linen isn’t likely to fray with the interfacing on, I just thought that as this hem would be visible on the inside of the top and the bottom of the book it would look neater.
5. I did think it looked a little plain all bare and brown so I found a piece of very simple cotton ribbon which I machine sewed onto the front cover. I then played with typing my name onto some ribbon and wondered about various ways of putting my name on the front cover but none of them looked quite right and I did feel this shouldn’t look too ‘hand made’ or ‘cutesy’. If this is for a personal project this is the bit where you can go bonkers with your covers decorating them, embroidering, sewing, sticking things on, typing onto, drawing or printing on or whatever takes your fancy.
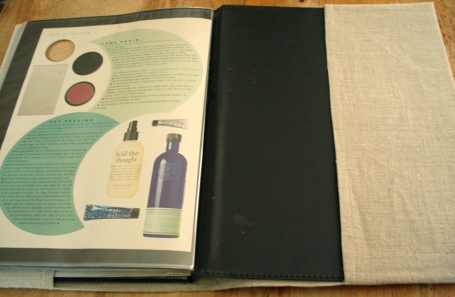
Here you can see the back page and how the back flap folds over.
6. Next I folded over the top edge and the bottom and pressed flat with lots of steam making sure that the finished height it is just slightly longer than the height of my book.
7. Then I turned in both ends about a centimetre, pressed them down with an iron for a nice crisp finish and machine sewed them down
8. I then folded in the front and back flaps making sure the book was shut when I measured for this bit as the fabric has to reach around a bit further with the book shut. And again pressed flat and then hand sewed them. This means this cover is not removable as it’s on a rigid cover book. On a soft cover, you’d be able to slot your book in and out.
9. Ta da! All finished.
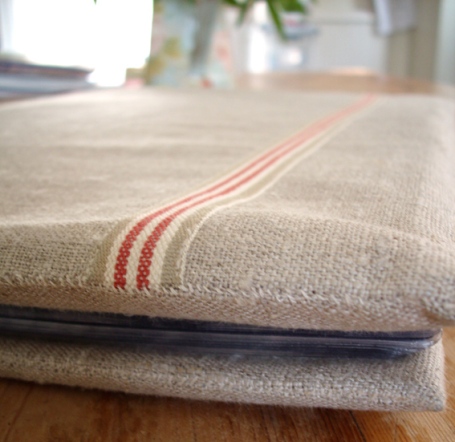
Ends of book close up. Look at all those tiny stitches
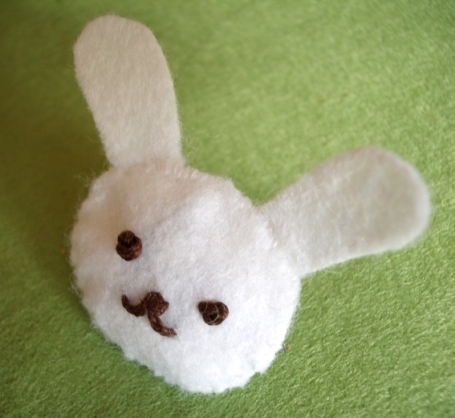
Cute alert!
Am dreading when my girls get to the day where they reject all things cute. What will I do? I’ll have no way of disguising that it is actually me who has the Hello Kitty fetish.
I’m fully appreciating their love of all things cute though while it lasts so when I found this book by Aranzi Aronzo, I was a bit excited. They’ve done a few books and all full of more cuteness than you can throw a pussy cat at. The one I have is called simply Cute Stuff. I rarely actually buy craft books because I prefer to just make stuff up as I go along but the layout of this book is very inspiring in design terms so that was what got me parting with my dosh.
I really should be doing other things but justified this project as it’s so quick. I shall be making more such as squirrels, sprites and other assorted creatures to be friends with the bunny. The book suggests these are hair bands but I sewed this one onto a safety pin so it can be attached to clothing or bags or whatever else may need a little bunny to keep it company…
Buttons, buttons everywhere
What else to do whilst watching Kirstie Allsopp’s Homemade Home but to make stuff. So I settled myself down with some buttons to cover in various sizes and here they are…
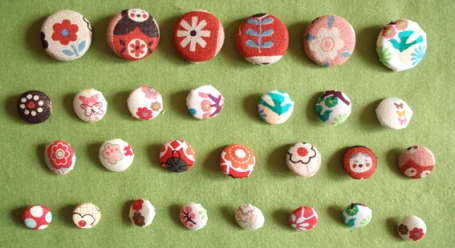
Now of course I need to make lots of stuff to put them on. Have put some on hair grips already for when a girl needs her hair accessories. Going to sew a few onto some hair bands for the girls to wear. Need to find some cute material now to match their school uniforms so they can do cute and be all matchy matchy at the same time. A lot of the fabric scraps used here are japanese imports from places like Fabric Rehab.
This week I have mostly been making… bags
Well I looked at problem of kamikaze soft toys trying to meet their maker off the top bunk and decided bag to contain them would need to be of gigantic proportions so instead busied myself with smaller bags. Smallest daughter has taken a shine to hers so much that she puts her favourite rabbit inside it and then cuddles the package in bed. Bag, rabbit and all.
Eldest daughter already likes to be v involved in all decision making processes along the way and has a good eye for colour and what works together. That squirrel fabric she’s got her little mitts on in the picture is some given to me by my Mum from which she made things for me as a baby. I love the history of crafting and making which often goes through the female generations of families.
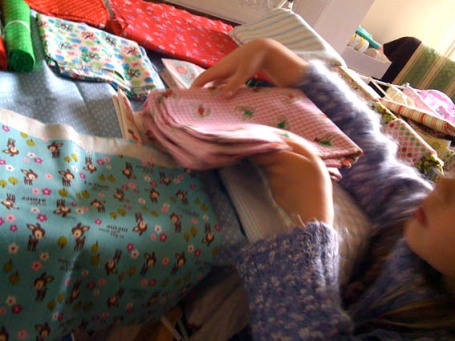
Should I go for squirrels or fawns, cherries or trees?
One of my favourite ways of labelling things is to use an old fashioned typewriter. The hit and miss way the ink takes to the paper/fabric is one of those happy accidents. Sometimes I type the words out a few times and choose my favourite. It’s great for making gifts for people to personalize stuff if they don’t mind walking around with things with their name emblazoned on the front. Eldest daughter already requested hers just had her first name and not the entire thing out there. For these bags I basted the fabric on and then sewed ribbon around the edges to frame it. Extra beads were then added for sparkle and prettiness. What I would have done if I’d had boys I don’t know. All those lost opportunities for prettifying things.
Then it was a case of sewing it all and ta da – two bags all fully lined and stuff. Oh I added a running stitch in embroidery thread onto both too. In design, I’m all for the less is more. Sewing I tend towards a ‘more is more’ approach. Still tempted to add beads (I have red heart shaped beads) to end of straps.
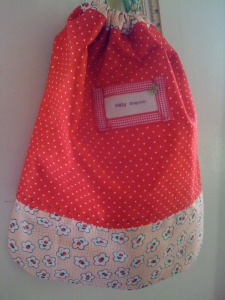
Spotty bag
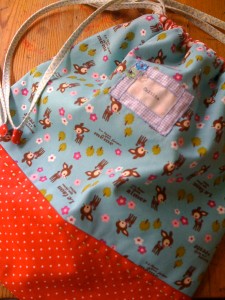
Fawn fabric bag
Apologies for pics as they were taken on my iphone so not the greatest quality. May retake and replace soon but just wanted to share. Oh and pattern (minus name labels and embellishments) was from Sew Hip Magazine – a mag with suprisingly cool, cute and quirky things to make but with a (sorry Sew Hip) hideous masthead – not so much hideous but I don’t think it suits the brand so well. Hopefully they will do brilliantly through word of mouth as it’s also hard to find on the shelves and isn’t even in the big WHSmiths at Victoria Station. I think I drunk ordered a few back issues and a subscription the other night at 3am – I can’t remember and it’s not showing on my bank statement yet but I’m hoping I did. I have a vague memory of doing so. Perri Lewis showed me my first copy or I’d never have picked it up off the shelf so thanks to Perri.
